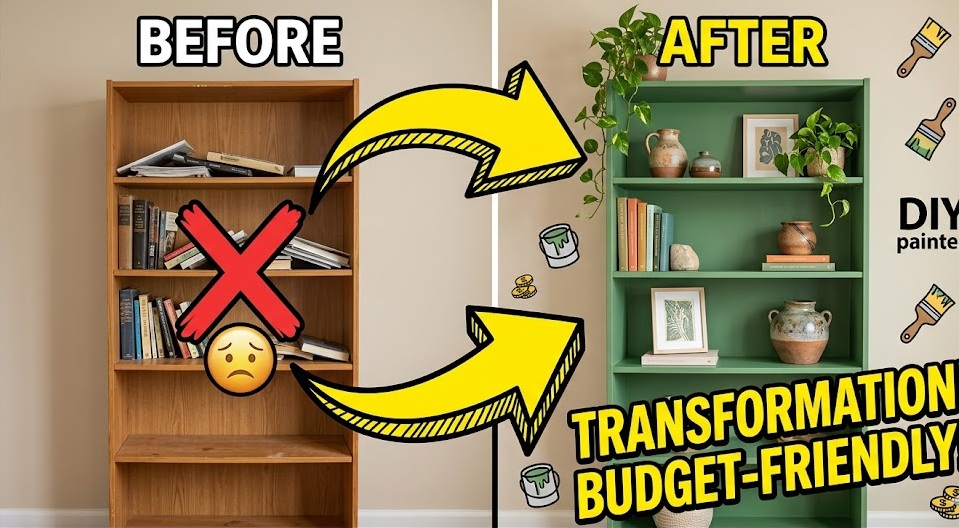
If you are looking to revitalize a dull wall or breathe fresh energy into a tired room, DIY painted shelving is one of the most effective, budget-friendly design moves you can make this year. Instead of spending thousands on new furniture, giving your existing built-ins or plain floating planks a vibrant coat of paint allows you to introduce a striking pop of color without overwhelming your home’s foundation.
The beauty of this project is its low-stakes flexibility. Unlike repainting an entire room—which requires intense labor—focusing creative energy on your storage areas lets you experiment with rich, modern tones like earthy sage greens, deep terracottas, or moody charcoals.
In this guide, we will explore five ways to execute this trend flawlessly, complete with the essential prep steps required to achieve a professional, scratch-resistant finish on any surface.
Why Painted Storage is Dominating Home Trends
The design landscape has shifted dramatically away from cold, sterile minimalism. Homeowners are searching for tactile warmth and visual depth that reflects their personal style.
A quick look at current interior design patterns highlights a major move toward creating focal points through accents rather than massive structural overhauls. By utilizing paint strategically on your shelves, you can turn a generic storage feature into an architectural statement that highlights your curated books, pottery, and art pieces.
5 Creative Ways to Paint Your Shelves
1. The Monochrome Contrast Trick
Paint the entire shelf setup—the brackets, the supports, and the planks—the exact same color as the wall behind them. This creates a high-end, seamless built-in look that makes small rooms appear significantly larger and more cohesive.
2. The Pop-of-Color Backing
If you are nervous about going too dark, leave the outer frames and shelves a clean white or natural wood tone. Paint only the flat backing board or the drywall behind the shelves. This adds an unexpected, sophisticated layer of depth when your items are styled on top.
3. Moody Color-Drenching
Embrace rich tones by using a deep satin finish like navy blue, forest green, or charcoal grey. This works beautifully in home offices or cozy reading nooks, transforming basic pine boards into a moody, high-end library environment.
4. Two-Tone Alternating Planks
For a playful, modern aesthetic, paint the vertical support units a neutral cream or beige while applying a bold accent shade to the horizontal planks. The contrast breaks up visual repetition and draws the eye directly to your shelf display.
5. Faux-Stoneware Finish
Mix a tiny amount of fine texture powder or baking baking soda into your paint before applying it to the shelves. When dried, it gives the wood a textured, plaster-like, or concrete appearance that mimics the organic, sculptural stone pieces dominating modern luxury homes.
The Ultimate Shelf Prep & Painting Guide
To ensure your books and decorative objects don’t stick to the surface or chip the paint over time, you must follow a meticulous application process.
- Step 1: Deep Clean and Sand: Wipe down the shelving unit with a degreaser. Use 120-grit sandpaper to scuff the surface, especially if you are working over smooth laminate or an old glossy varnish.
- Step 2: Use an Oil-Based or Shellac Primer: This is a crucial step. Basic water-based primers won’t block wood tannins from bleeding through, nor will they stick well to slick laminate shelves.
- Step 3: Choose Cabinet or Trim Paint: Do not use standard wall paint for shelves. Wall paint remains slightly soft and flexible, which causes items to stick. Opt for a premium waterborne alkyd enamel paint, which cures to a rock-hard, durable surface.
- Step 4: Allow to Fully Cure: While the paint may feel dry to the touch within a couple of hours, do not place heavy objects on the shelves for at least 3 to 5 days to allow the enamel to harden completely.


")


")

